PhotoModeler’s Coded Target Presets
This blog post is about a specific topic of interest to those using Coded Targets especially in the fabrication industries like boat decks, stair cases, kitchens, etc. We have a few more posts coming up on Coded Target capabilities. See a video on the topic below, or click here to view the video with captions.
PhotoModeler can carry out several automated and semi-automated operations in projects that have Coded Targets: such as setting up scales, coordinate system definitions, line creation, offset creation, and plane surface creation.
These automated operations can greatly improve the efficiency, and reduce user work, in a number of measurement tasks using Coded Targets. The power comes from the ability to define what each Coded Target does in your project. For example, two Coded Target ids can define a scale, or three Coded Target ids can define a rotation. When these Coded Target ids are automatically identified by the program, the corresponding scale, coordinate system, plane etc is also created with no additional user interaction. This article describes how to create, modify, and use Coded Target Presets.
Previously these Presets were defined in a limited way in a Preferences tab. Starting with version 2020.1, the definitions are now much more flexible.
Coded Target Preset Configurations can now define:
If you're using the new Letter Sheet Coded Target System, a configuration will be loaded already. See below for instructions on applying this or any configuration to new or existing projects.
Where are the new Coded Target Preset settings?

The 'Targets' workspace (i.e. the ribbon toolbar workspace that is visible when a Coded Target project is started or opened) has a new tool to access the preset configurations. The tool is on the 'Create' tab. and is called "Coded Target Presets...". Coded Target Presets can also be accessed without a project open if the Targets workspace is up.
Viewing Preset Configurations:
Various configurations of presets can be created and stored in your Presets 'library'.
PhotoModeler stores the new Letter Sheet Presets configuration by default. If you previously used 'RAD Target' settings in Preferences, a 'Legacy' configuration matching those settings will also be stored.
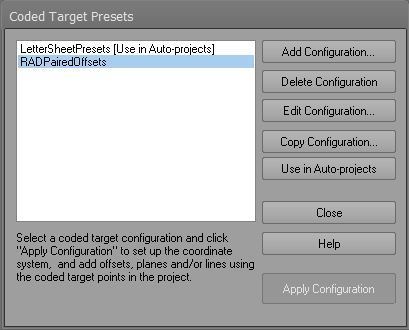
Use the Coded Target Presets dialog to Add, Remove, Edit or Copy a preset configuration. You also set a preset configuration to be used in new automated coded target projects. The Apply Configuration button is used to apply the coded target presets to the currently open project. This is a useful way to test your settings before using them in future projects.
Click the Help button on the dialog for more information on preset configurations, or visit the online Help section here.
How do I set up my own coded target preset configurations?
If you used the Coded Target Preference settings in older versions of PhotoModeler, a 'Legacy' preset will have been added to your preset configuration library and shown on the Coded Target Presets dialog. Coded Target ID ranges will match previous settings to set up the coordinate system. It should also be designated as the preset to be applied for new automated coded target projects.
To set up a new Coded Target preset configuration, click the 'Add Configuration...' button. It may be easier to copy an existing configuration and edit those settings, rather than start one from scratch.
To set a configuration to be used in new automated Coded Target Projects, select the configuration at left and click the "Use in Auto-projects' button - the configuration will be labeled appropriately (only one configuration can be applied to new projects). This means that when you start a new Coded Target project, a configuration is set to be 'used', and if the appropriate targets are found in the images, then the corresponding action (like scale) is taken with no added user action!
Adding or Editing a Coded Target Preset Configuration
When you Add or Edit a configuration, the dialog is used to set up the various components.
Use the pre-established Coded Target ID's to set up one or more of the offsets, coordinate system, planes or lines.
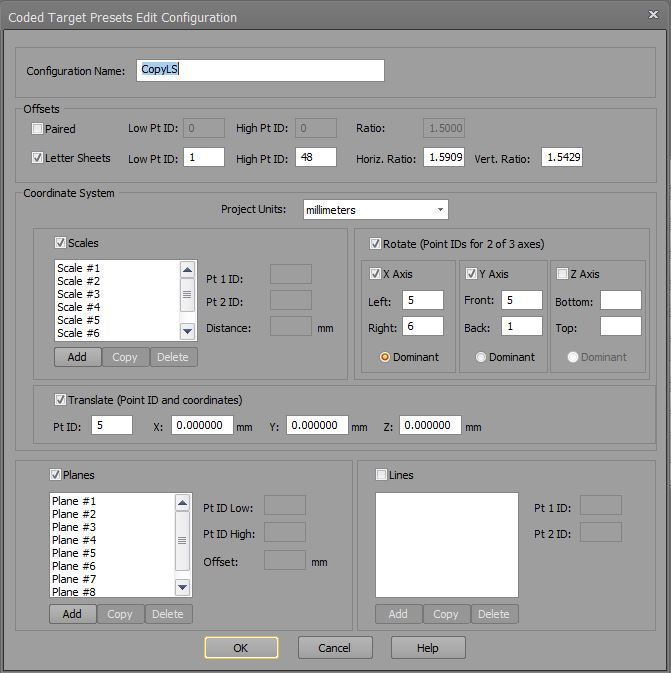
Click the Help button on the dialog for more information on adding or editing preset configurations, or visit the online Help section here.
How to Apply the Coded Target Presets
Once you have a preset configuration set up, or if you're using the Letter Sheet Coded Target detection system, select the configuration in the Coded Target Presets Dialog and click "Use in Auto-project'.
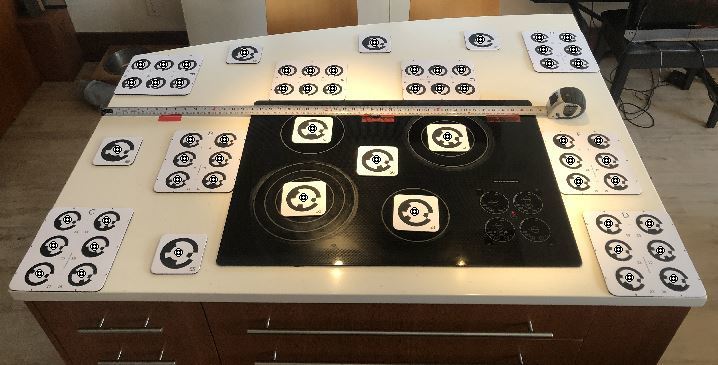
This will cause the configuration to be applied during an automated coded target project - the components of the configuration will automatically be set up in your project, such as offset points, scale/rotate/translate, planes and/or lines.
If you have a project open you can also apply a selected configuration to the current project by clicking the "Apply Configuration'.
We recommend that if your end goal is to automatically apply presets to all Coded Target projects you create, that you first create a test project without presets. Then with this project loaded, access the Coded Target Presets dialog, make your changes, save the preset configuration, etc., and then use the 'Apply Configuration' button to see if it has the desired end result. You can then click the 'Use in Auto-projects' to have it applied to all future automated projects.
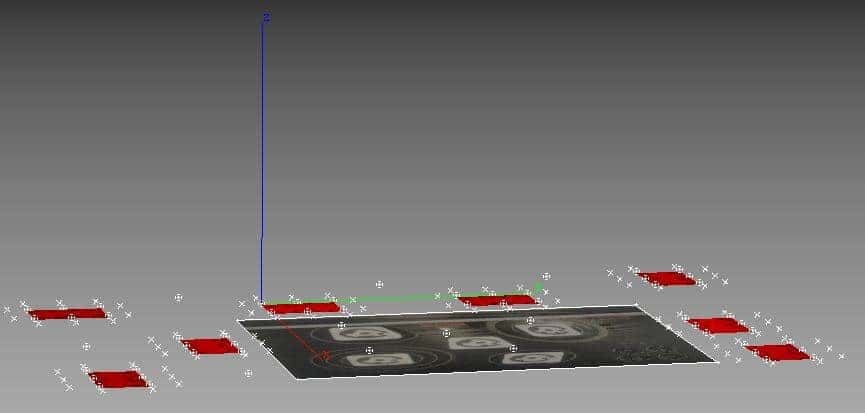
Example Coded Target Project with coordinate system and plane presets applied.
For more information on using Coded Target Preset Configurations, including setting up your own, or using your old settings, please contact Technical Support.
support@photomodeler.com
