
Tip 72: Exporting a 3D model for use in Google Earth
Did you know that 3D models created in PhotoModeler can be transfered to Google Earth?
If your model has a geographic coordinate system set up it can be exported from PhotoModeler in the .kmz format and viewed in Google Earth. It’s a great way to share your models with colleagues, friends, or the Google Earth community! As well it can be helpful to see models in their geographic context with terrain.
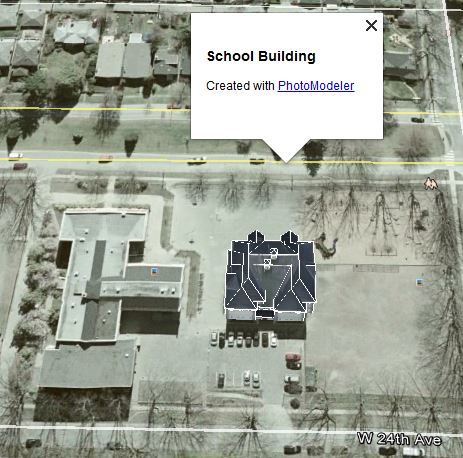
First, build the model in PhotoModeler. Note, the Google Earth export format supports lines, curves, cylinders and surfaces, and the surfaces can be photo-textured.
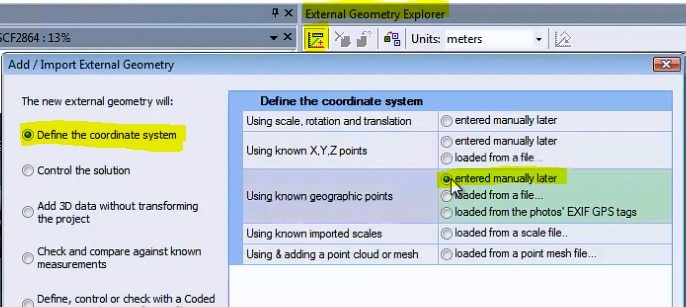
Once the 3D model is complete a geographic coordinate system is set up. This step is done in PhotoModeler’s External Geometry Explorer, with “Define the coordinate system”, and the “Using known geographic points” option.
There are three options for getting the geographic coordinates into PhotoModeler:
- Entering the coordinates manually.
- Loading the coordinates from a survey file.
- Loading the geographic coordinates from the photos’ EXIF GPS data.
In our example project we had no survey information, and the camera that took the photos does not have GPS capability. Therefore, we manually added the known point positions one coordinate at a time.
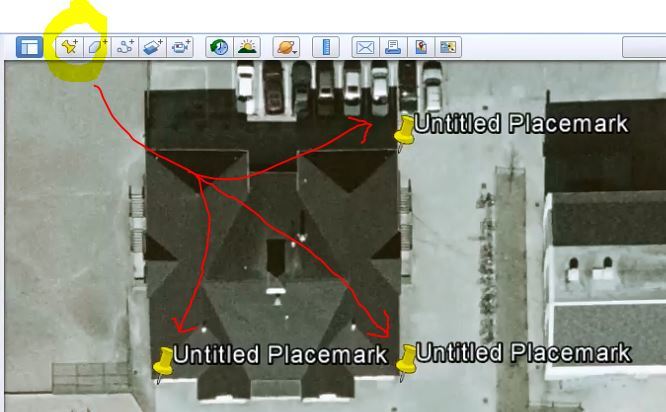
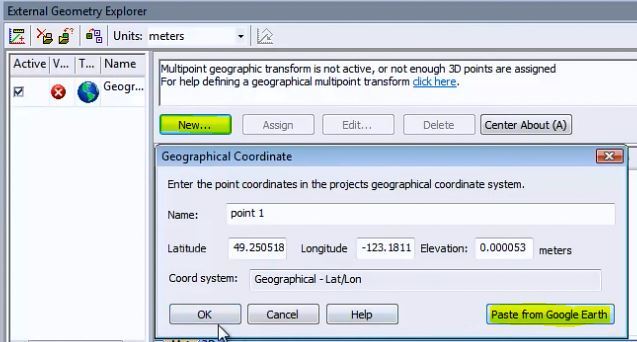
The easiest way to obtain the geographic coordinates in this particular application was to copy them from Google Earth. These are the steps: while keeping PhotoModeler and its External Geometry Explorer open, Google Earth is launched, and the view is navigated to the location of the object on the earth surface. Pins and place-marks are used at three or more locations that can be assigned to points in the PhotoModeler model. It’s a good idea to spread these points out in the scene for a better fit. Here three bottom corners of the building are used:
Once the pins are placed in Google Earth, their locations are copied one by one (select pin, choose “Copy” on the right click menu). Return to PhotoModeler, click ‘New’ to create a point in the External Geometry Explorer and then click the “Paste from Google Earth” button.
Repeat so that a geographic point is defined in PhotoModeler for each Google Earth pin location. These geographic coordinates are then assigned to the model by selecting the point in the External Geometry Explorer’s table, then selecting the appropriate 3D point in the model (select a point on a photo or in the 3D viewer) and clicking the “Assign” button:
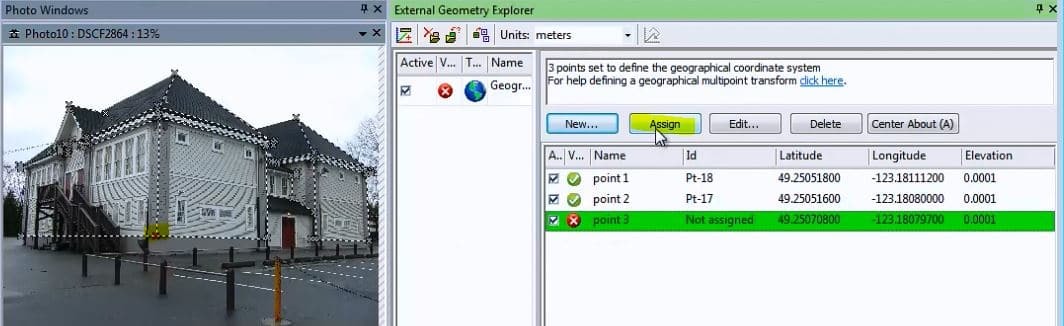
The coordinate system transformation in PhotoModeler will be valid once three or more 3D points have been assigned.
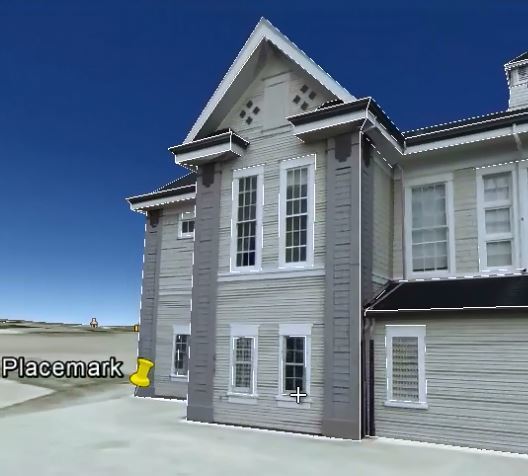
Save the model, and export it in the .kmz format. When the export is finished, click the “Open” button to launch Google Earth and view your model in the correct geographic location:
Watch the Youtube video for an overview of the Google Earth export process: