
Tip 71: Using Landscape and Portrait Oriented Photos
Did you know that you can use landscape-oriented and portrait-oriented photos in PhotoModeler, and use both types mixed in the same project if needed?
Sometimes the object/scene being modeled is a shape that is best captured using a mix of portrait and landscape photos. This can help improve scene coverage, which is important when trying to mark points in multiple overlapping photos.
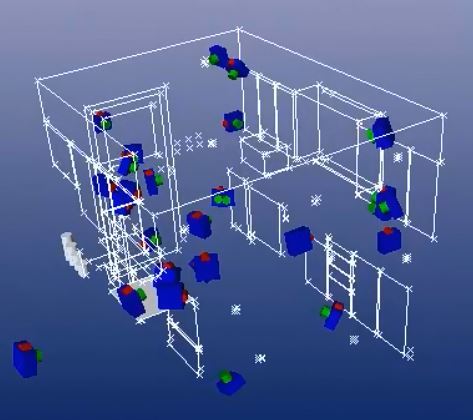
The 3D View below, of a small kitchen modeling project, shows the camera stations (the blue cuboids with green lens and red top) in both portrait and landscape orientation:
Note that some digital cameras have an ‘auto-rotate’ feature which automatically rotates photos depending on the way the camera was held. You’ll want to disable this feature so that the images are stored on disk with a consistent aspect ratio, which keeps your images consistent with your calibration – a key requirement for a PhotoModeler project.
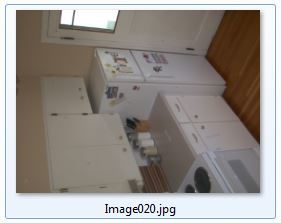
The main purpose of an auto-rotate feature is for ease of viewing, such that a auto-rotated image will always appear ‘upright’ when viewing on your computer (and can save you from neck strain!). For example, as shown in Windows File Explorer, this project image was taken with the camera rotated to portrait but with the camera’s auto-rotate feature disabled:
Thankfully, you can set the photo’s display rotation in PhotoModeler, using the photo’s ‘Rotation’ property setting. which will display the image upright in PhotoModeler:
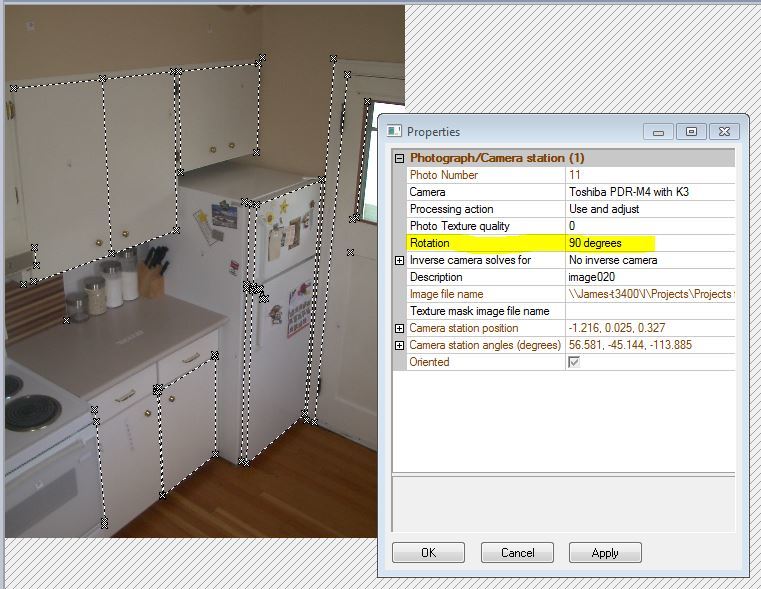
If the photo’s EXIF header contains the rotation information, PhotoModeler will set this property for you during project setup.
Rotate your camera to what ever angle works best for the project, keep the photos on disc in unrotated state (turn off auto-rotate if any in the camera), and use PhotoModeler’s own Rotation property to make viewing easier.
Watch the Youtube video for an overview of using landscape and portrait oriented photos: