
Problems with a Deck Project – Red X Photos
Problem Overview
With the right layout of targets and good photo overlap, PhotoModeler will automatically detect the targets and orient all photos (i.e. solve the position and angle of the camera when each photo was taken). When the project solves, the target points become 3D points and the surface planes can then be defined, and deck panel tracing can begin.
But sometimes, one or more photos don’t orient - a red X appears on the photo thumbnail to indicate this. When a photo is not oriented, no data can be extracted from it.
The Red X on a photo problem is usually due to one or more of the following:
Other tutorials and videos show how decking projects should be set up. We recommend starting there when learning boat deck measurement with PhotoModeler. See the Learning Boat Deck Measurement page for the learning resources.
In this document and the associated video, we will show how to recognize these types of problems by:
And then we can determine whether the project is:
Follow along in the video to see why a couple photos didn't orient and how we determine what to do next.
Below is a description of a set of steps to assess a problem project. The time code for the relevant clip in the video is shown. Scroll to the time in the video above, or click to view the part of the video in a new browser tab.
Once the project is assessed, we can determine if it's possible to correct the problem!
Assessing the Project
Assess the project - the example project was processed and we have a couple Red X photos (unoriented):
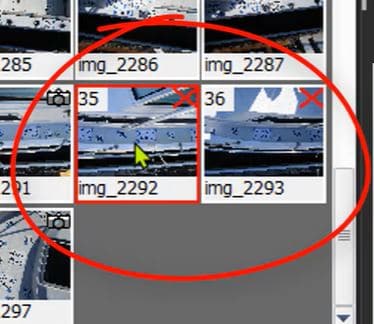
'Red X' photos.
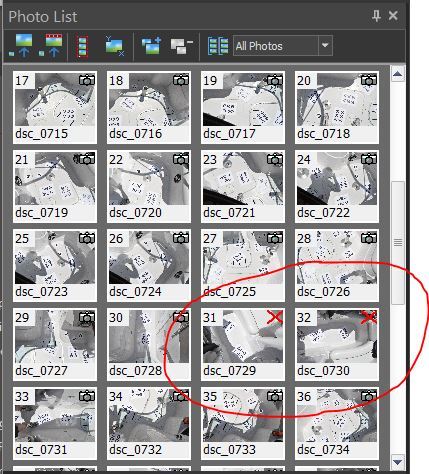
Big gap in photo overlap.

Typical unoriented photos.
Note: PhotoModeler needs a minimum of six points in each photo (ideally 10-15 or more), with good spread across the photo, and these points need to be marked/detected on at least two photos (ideally three or more). See the Minimums Section in the online Help.
Possible reasons for a low point count:
Related information for working with narrow areas and their specific issues can be found here: Photographing Marine Gunwales and Narrow Areas.
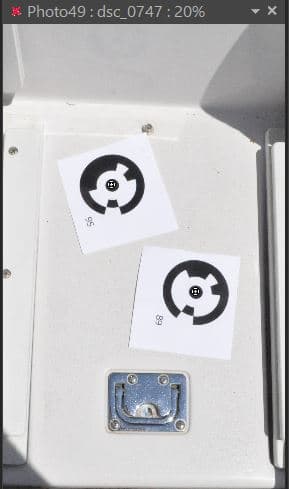
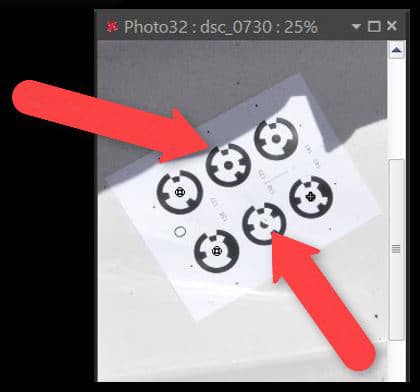
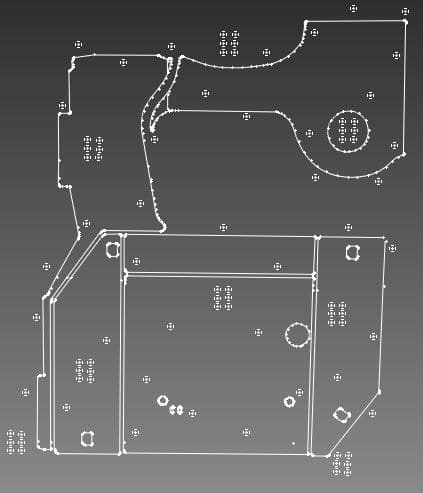
Too few targets.
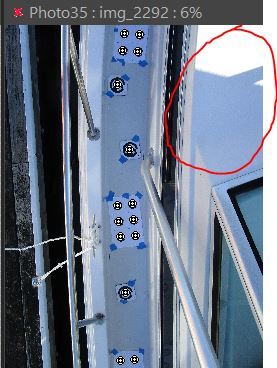
Targets too small and camera angle too low.
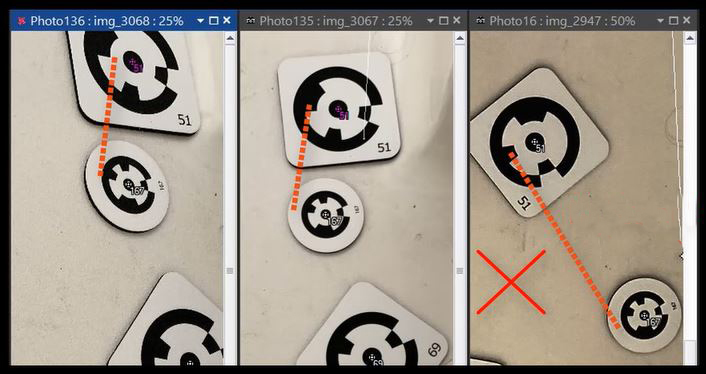
Targets are further apart in the 3rd image, it looks like one of them moved!
Shadows close to targets and rings or target damaged.
Other reasons photos may not orient:
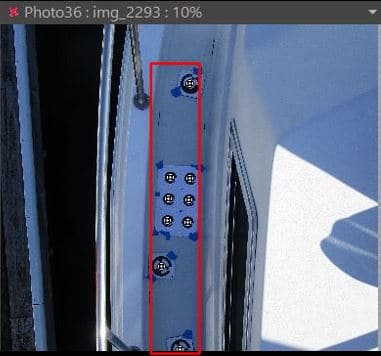
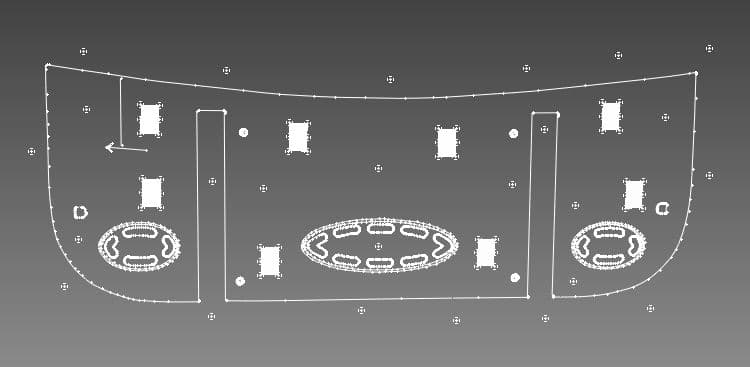
Low coverage, just a strip of targets.
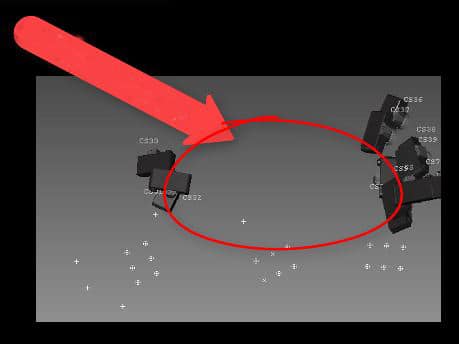
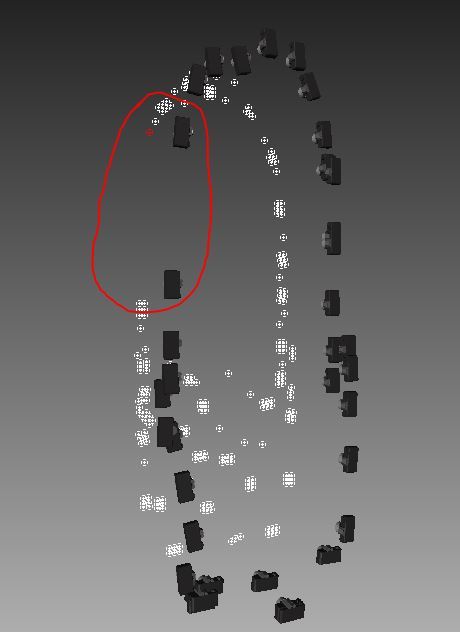
Bad overlap between these sets of photos.
Correcting the Project
Is the project fixable?
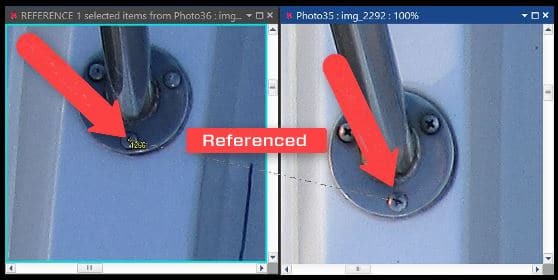
Points marked on screws and referenced.
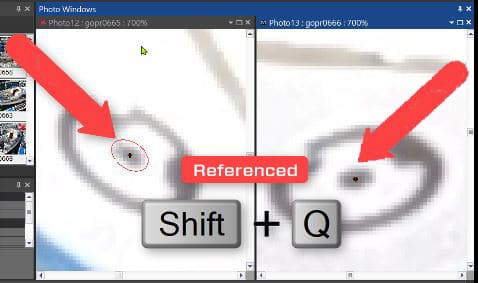
Point marked on one target, referenced to a coded target.

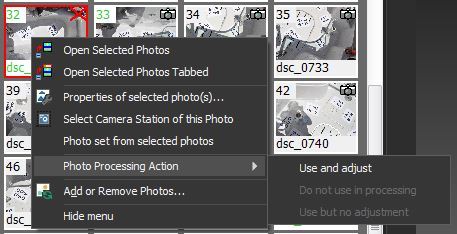
Set the photo processing action - right click menu.
If a project seems like it meets all requirements, projects can be sent to PhotoModeler Tech Support for a review. Use the 'Send Files to Support' tool (click File, Help, Send Files...).
If all of the required photos can't be oriented, perhaps the project can be split into separate projects.
A project for a distinct section of the deck - swim platform.
A separate project for the main cockpit area.
If there are too many issues, it may be most efficient to start the project over. Re-arrange and/or add targets, take a new set of photos and launch a new project.
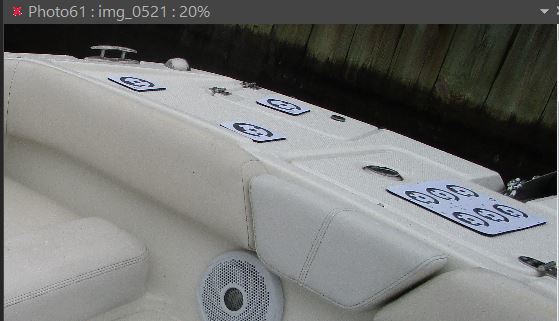
Could have placed some targets here.
Look for regions of the deck where targets could be added, for better spread and target point count, even on areas that will not be modeled or measured. Adding targets in these areas will help with orientation as they will tie the sections of deck together. 4:34
Take photos from higher up and add some angled photos so that more of the deck is captured. This also helps tie various sections of the deck together. 4:44
Good overlap, with overview photos.
Considerations for Future Projects
Once you've diagnosed the problem, take note of where things went wrong. Make sure future projects have a good target layout with good spread. Also make sure photos have enough overlap and include some overview photos that help tie the scene together.
A good way to reduce orientation and other project problems, is to bring your laptop to the project site, load the photos and run the project. Seeing the initial result will help identify orientation problems before you remove targets and leave the marina. If need be, new photos (e.g. angled ones), can be taken to help cover longer sections of the deck to tie the model together. But remember, don't move targets around unless you're starting a new project.