
How to Measure Marine Canvas with a Camera
The Concept
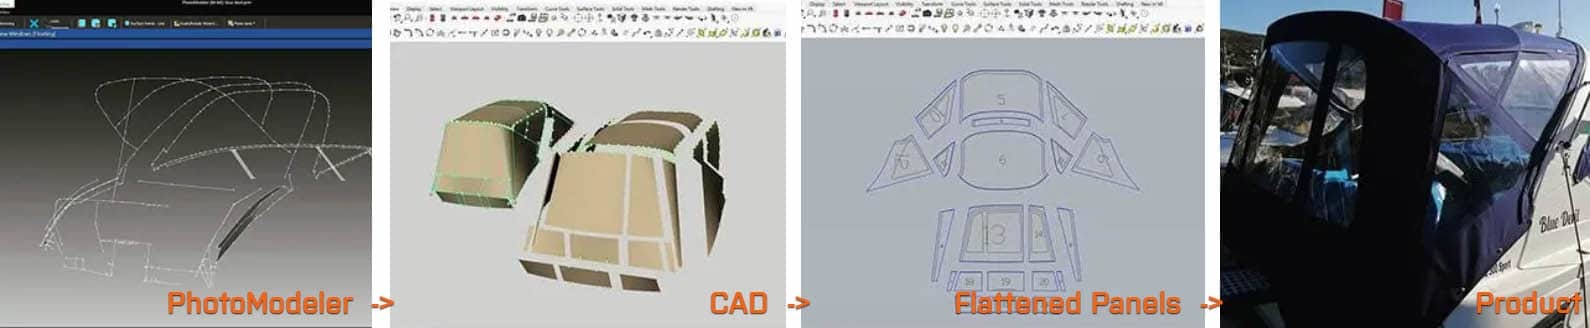
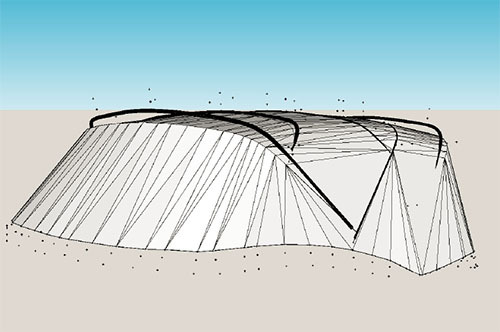
Replace physical canvas templating with digital templating by using your camera to create 3D tubes, frames, curves, and points for export to your favourite CAD. Watch the video below for an overview.

Introduction Video
The Steps
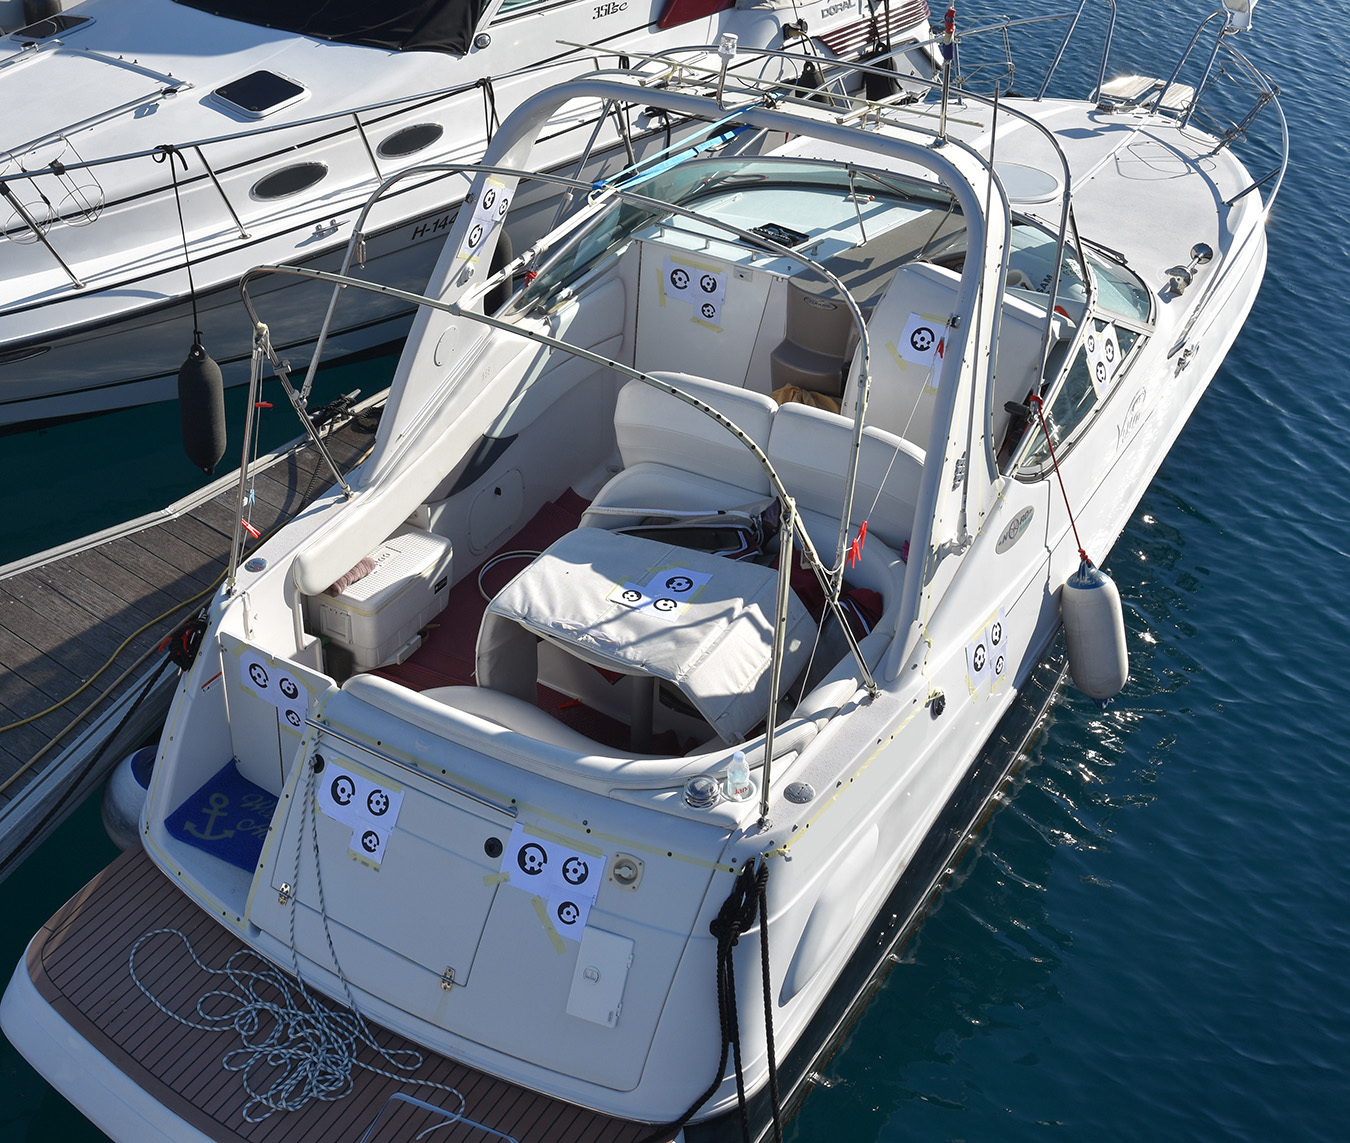
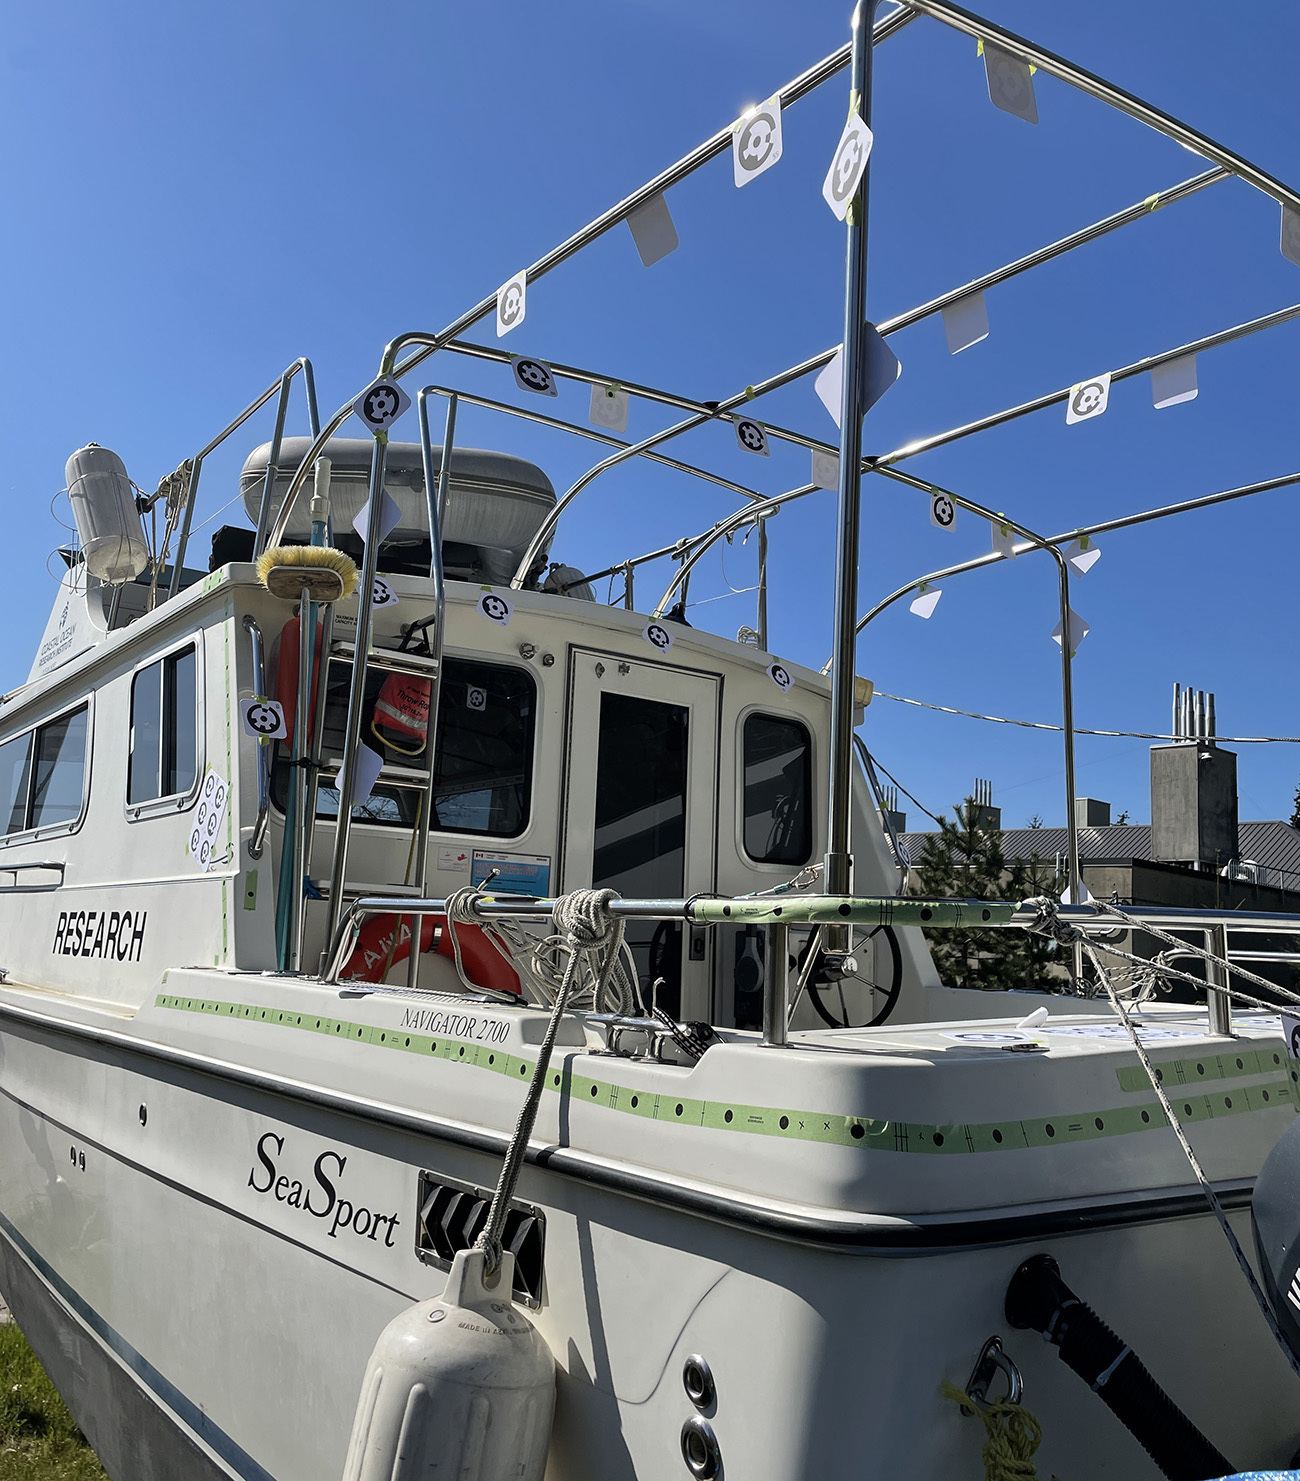
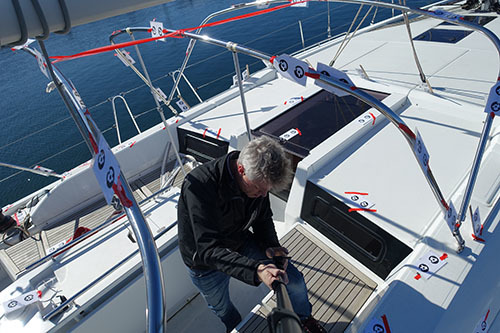
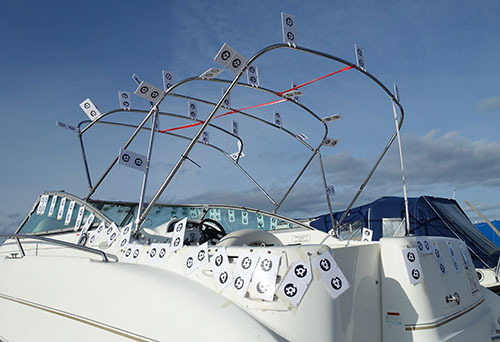
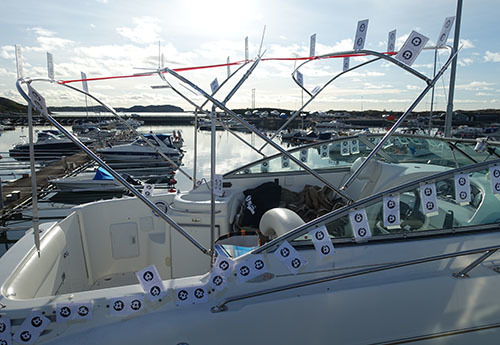
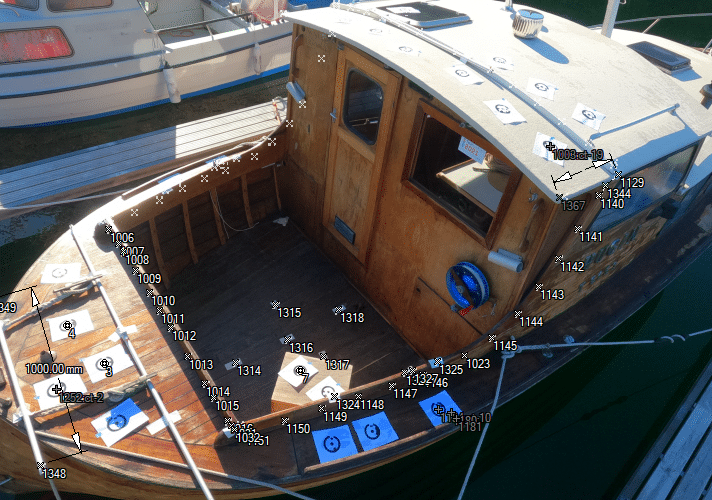
‣ Place targets and dot tape on the boat in key areas
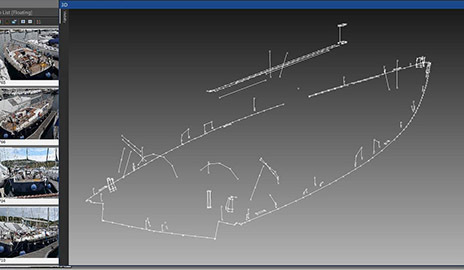
‣ Take photos from different angles and positions.
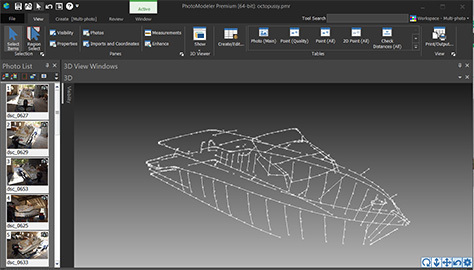
‣ Load photos into the PhotoModeler software and process.
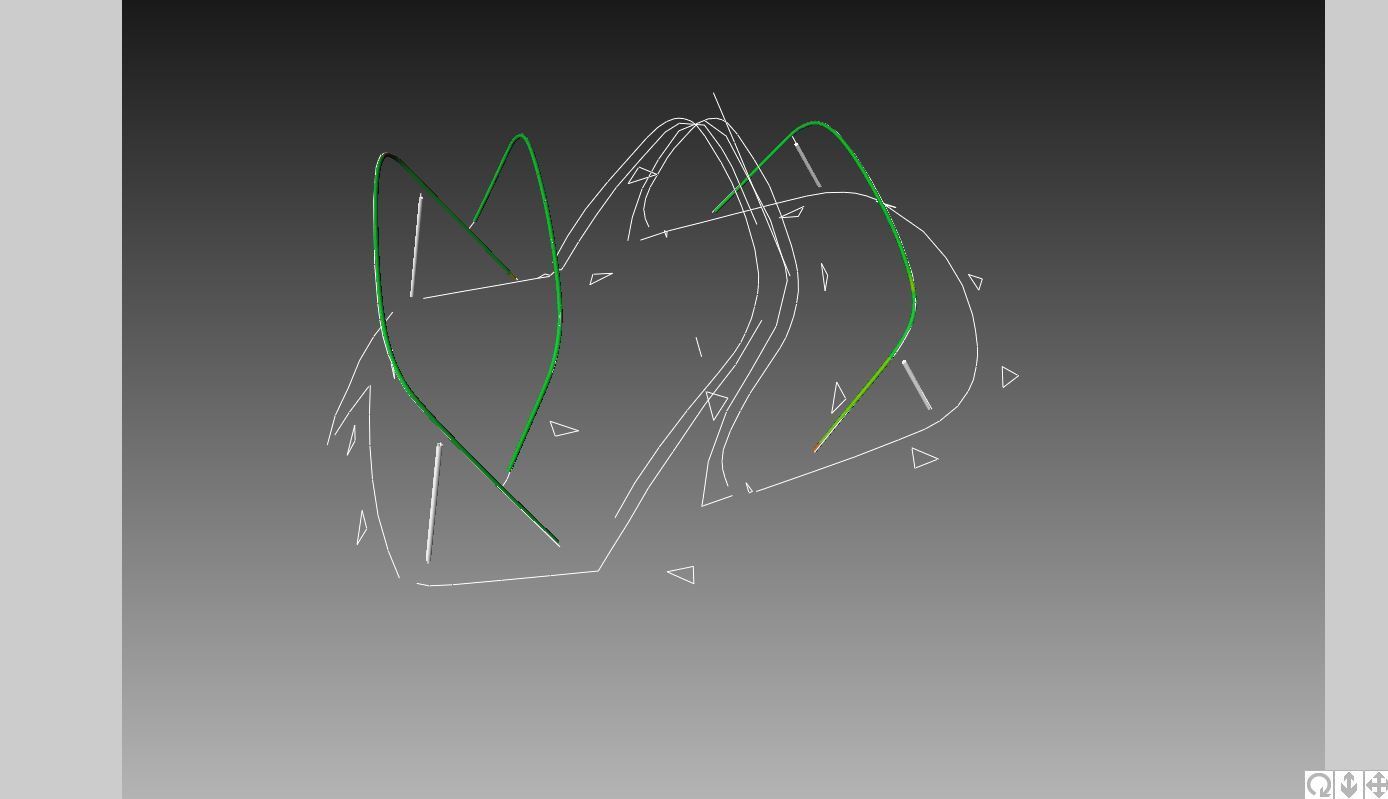
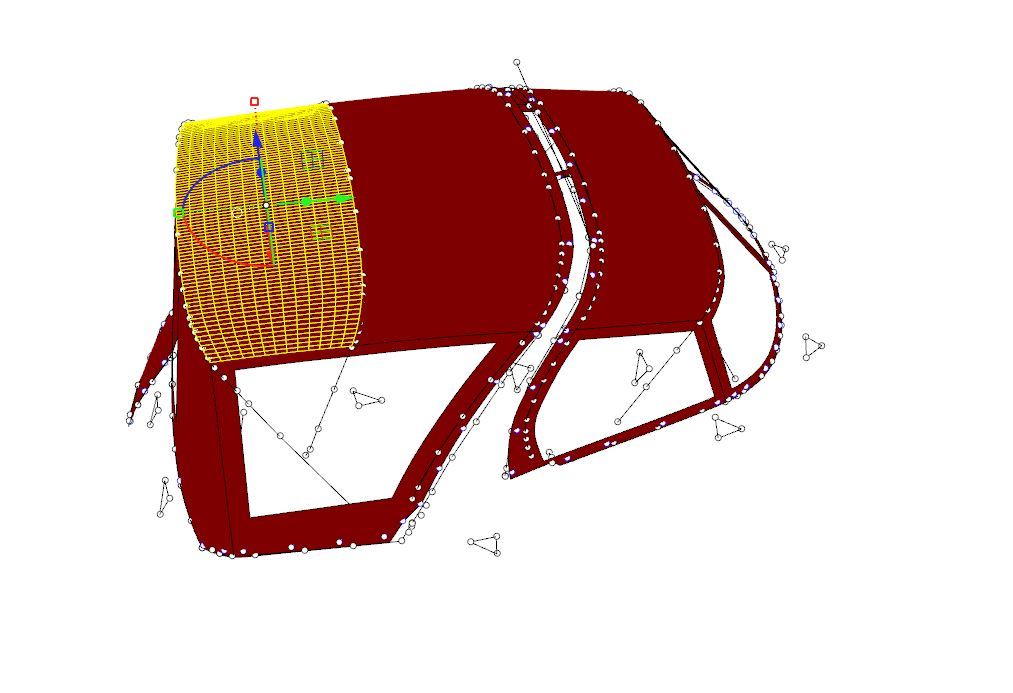
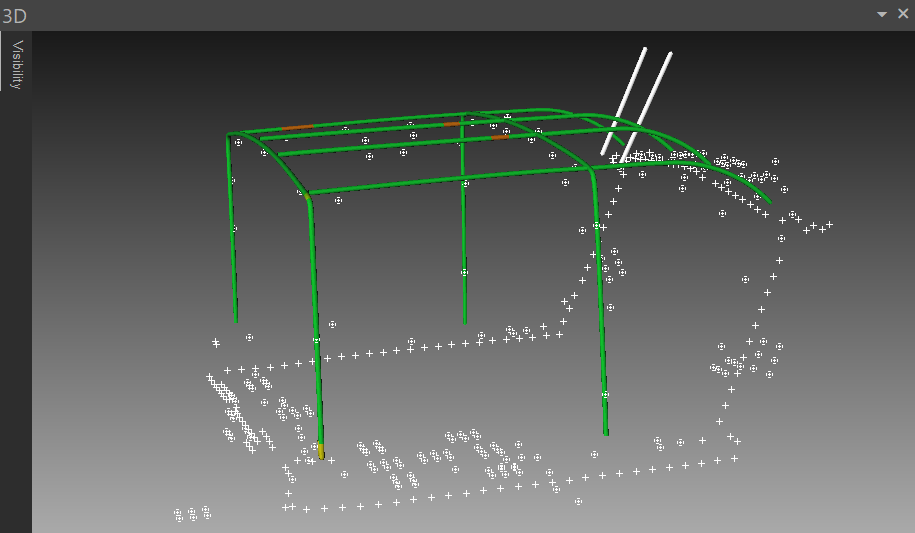
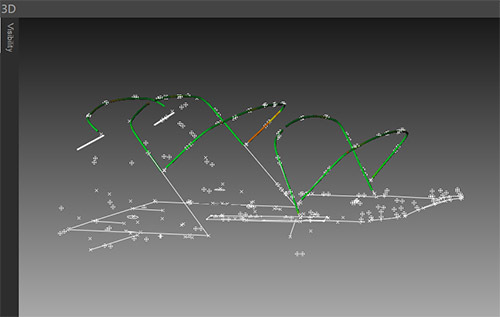
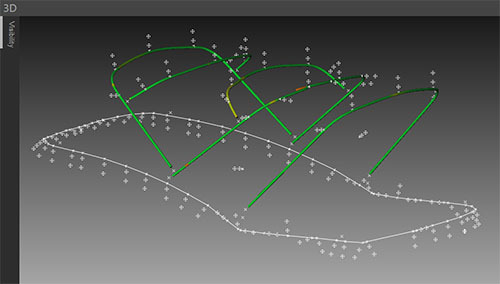
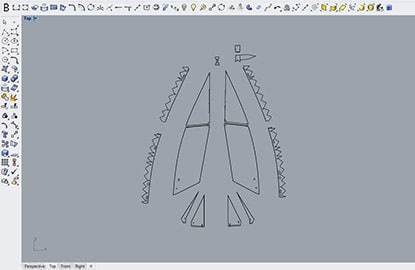
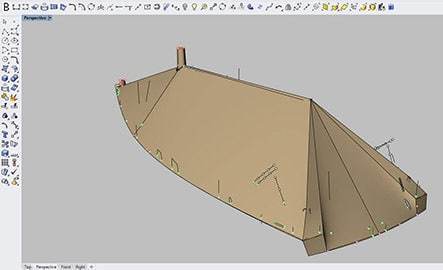
‣ Pick out points and model the canvas frames and tubes on the photos.
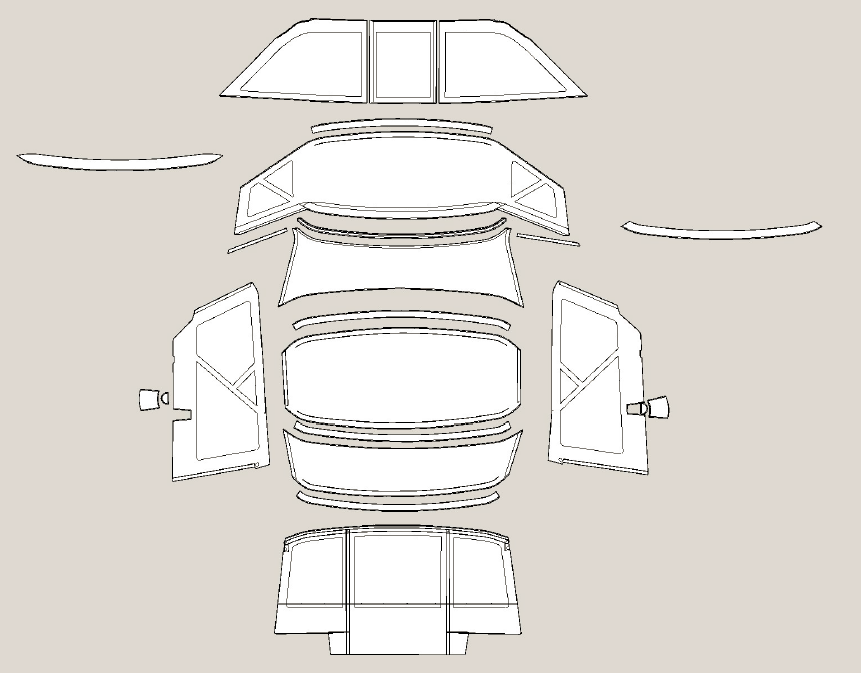
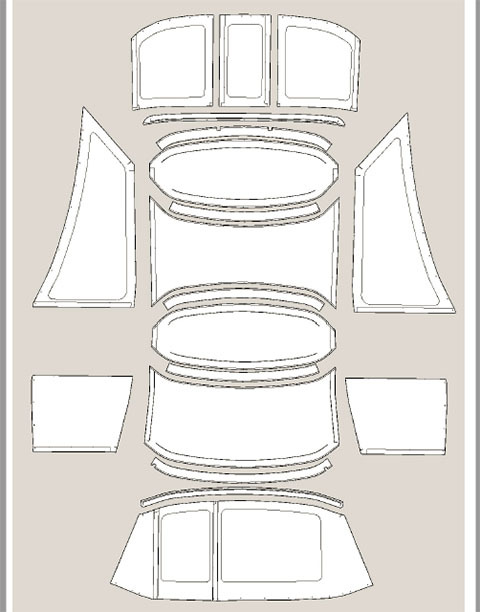
‣ Export to CAD/CAM to complete your work.
The Advantages
PhotoModeler has several advantages over the other technologies for carrying out direct 3D measurement needed for canvas replacement work. These technologies are laser distance meters, string distance/angle meters, laser scanners, and photogrammetry. PhotoModeler is a photogrammetry system (taking measurements from photos). PhotoModeler is an excellent, lower-cost, and higher-accuracy alternative to the Proliner Prodim. The advantages of PhotoModeler in general are:
PhotoModeler has been in the measurement business for 30 years and our software has a lot of powerful technology. While there is a lot of power and capability, it is also important to us to keep it accessible to a wide audience. Three key technologies used by PhotoModeler in marine canvas are: camera calibration (for highest accuracy with many different types of cameras), Coded Targets (for automation and accurate set up of projects and key points), and Bent Tubes (for modeling of canvas frames and tubes without pre-taping or any extra on-boat setup). See also comparison with other technologies.
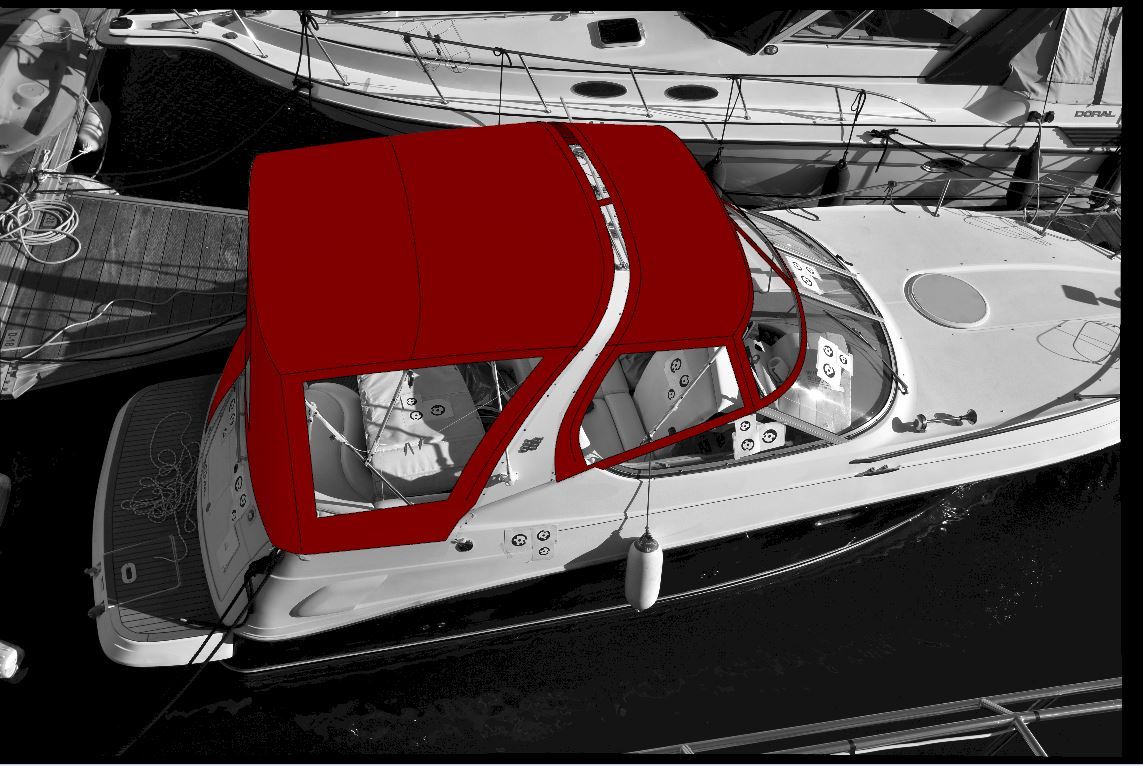
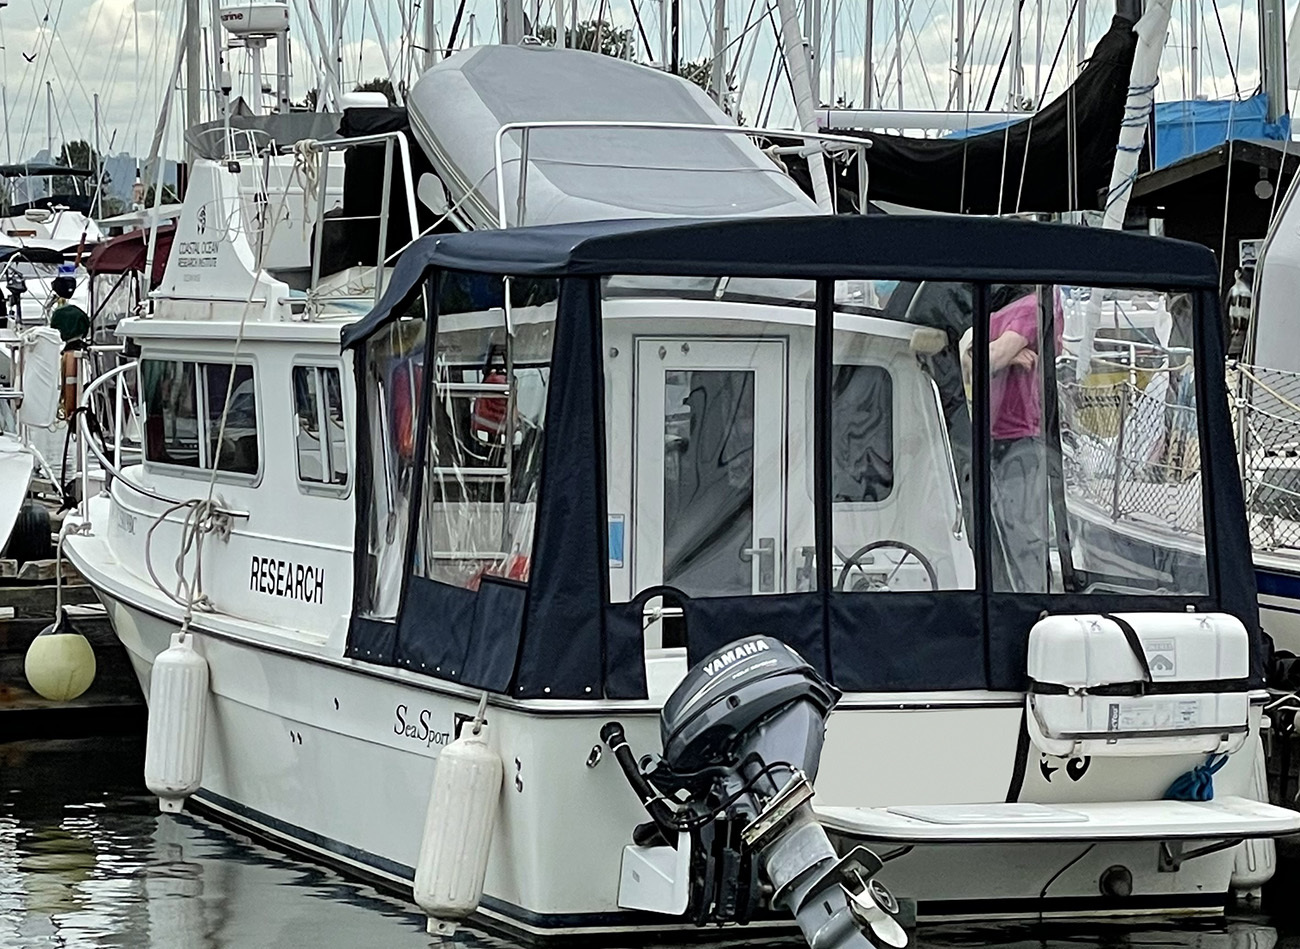
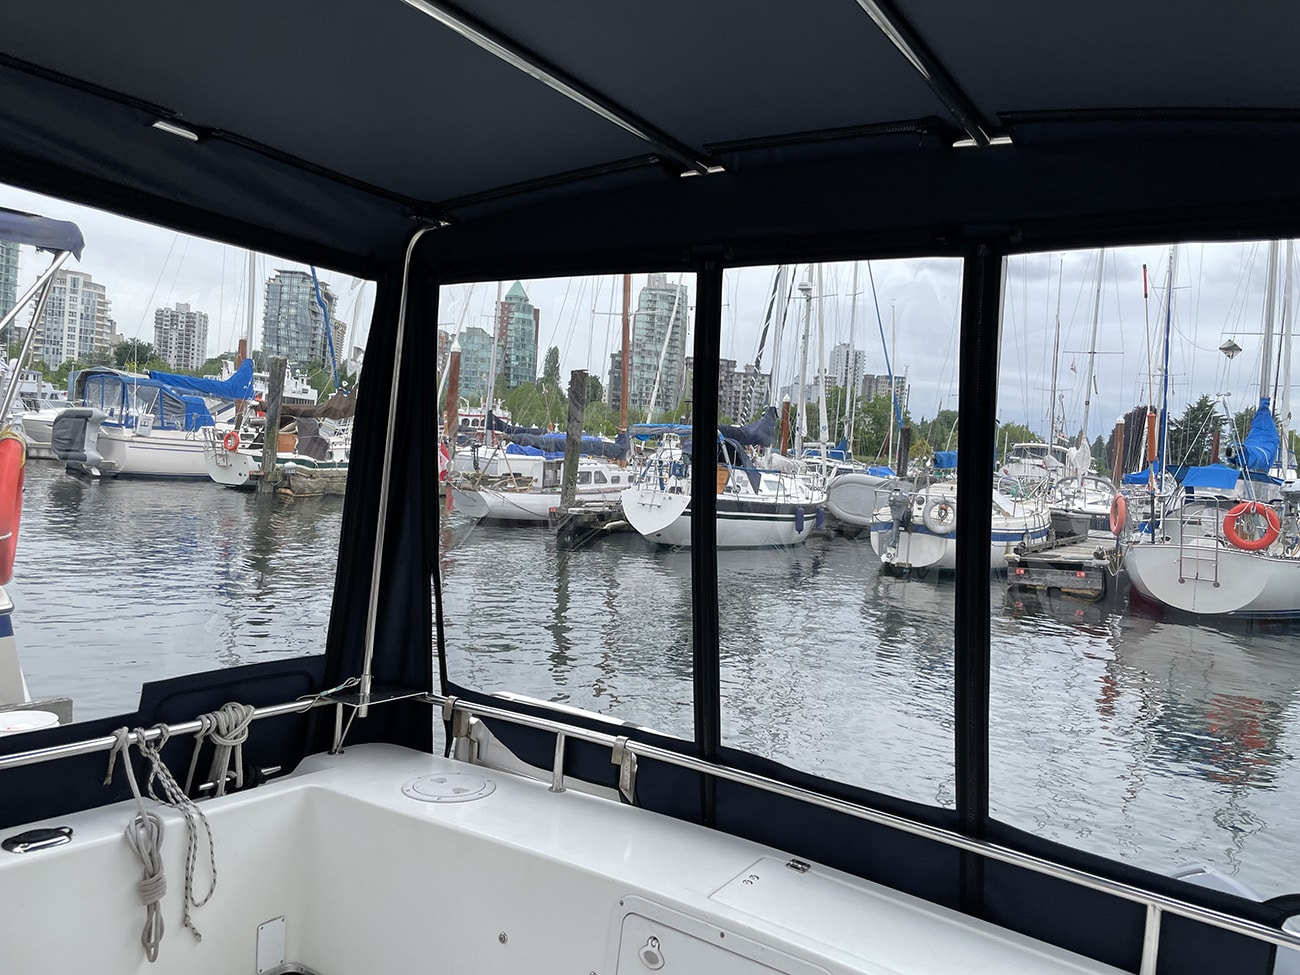
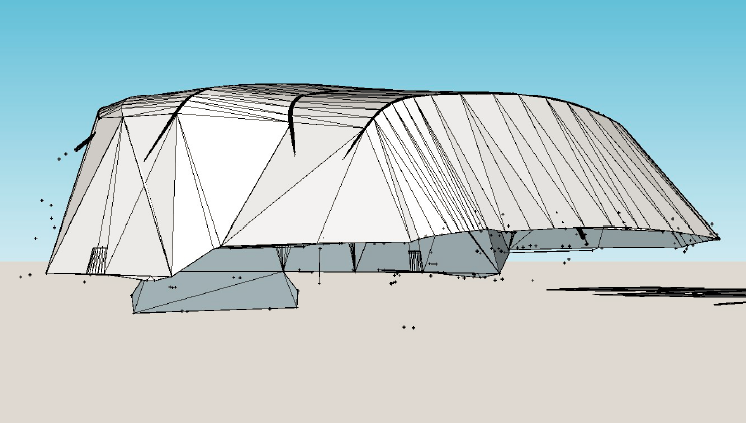
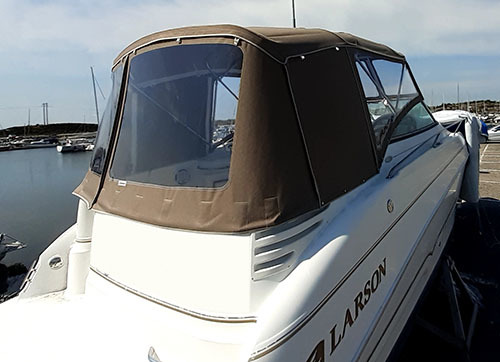
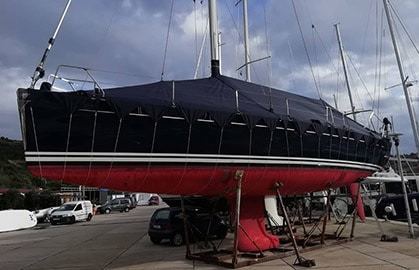
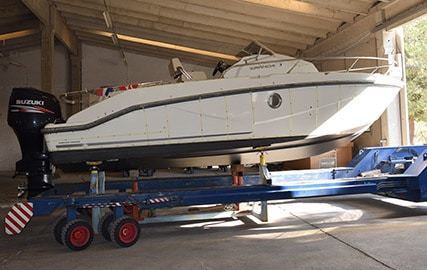
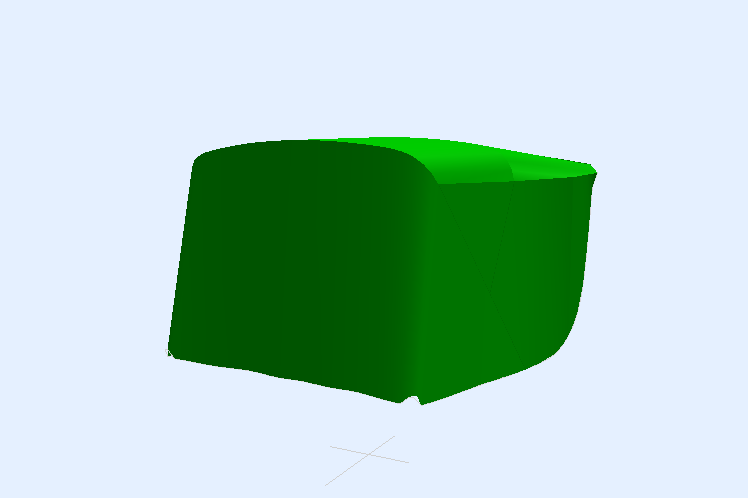
Example Canvas Projects
Here are some examples of boat canvas projects done from photography with PhotoModeler by our customers.
New to 3D Canvas and Digital Workflows?
Are you new to the world of digital workflows and 3D for marine canvas measurement and production? It can be hard to know how to start. Visit our New to Marine Canvas Digital Workflows? page for some ideas.
Instruction Videos
There are a number of ways to approach canvas measurement with a camera. This also depends on the end goal - a loose cover vs an accurate bimini or dodger/spray-hood. These methods are described in the document and videos shown below.
We suggest customers have a good CAD background and some experience with digital workflows to get the most out of the system at this time. As well these techniques are 3D vs the traditional 2D pattern methods, and that requires a deeper CAD understanding. There is a learning curve with this new system, so customers should be aware of the extra time and patience needed to get started! Suggested prerequisites for one or more of your team members:
Videos
Introduction | The Digital Templating for Marine Canvas with Your Camera video introduces the concepts behind using PhotoModeler for boat and frame measurement for canvas replacement. This video is a repeat of one at top of this page. |
Getting Started | The Getting Started with Marine Canvas Measurement video outlines the steps for starting a canvas measurement project in PhotoModeler. |
Points, Lines, and Curves | The Measuring Points, Lines, and Curves for Marine Canvas video builds on the Getting Started video and describes how to add points and other objects needed to complete a canvas measurement ready for CAD export. |
Bent Tubes | The Bent Tube Introduction video builds on the Getting Started video and describes how canvas support frames and tubes are modeled using PhotoModeler. |
Documents & Resources
Additional Resources
In addition to the documents and videos above, the following can be useful resources for training and setup:
- Intro to Canvas and CAD - a video introduction by John Bland on CAD and marine canvas.
- Tutorials - a listing of all the PhotoModeler tutorials.
- About cameras - a page talking about camera choice.
- About automation - a page talking about Coded Targets - how to use and get
- Photo Mast - an long pole designed for getting high photos (useful in some canvas projects)
- Photography course - first two modules of this course are a good photography primer.