
- /
- /
- /
Tips for working with PhotoModeler image planes in 3ds Max
In PhotoModeler there are options for exporting image planes under Options>Preferences>Exports.
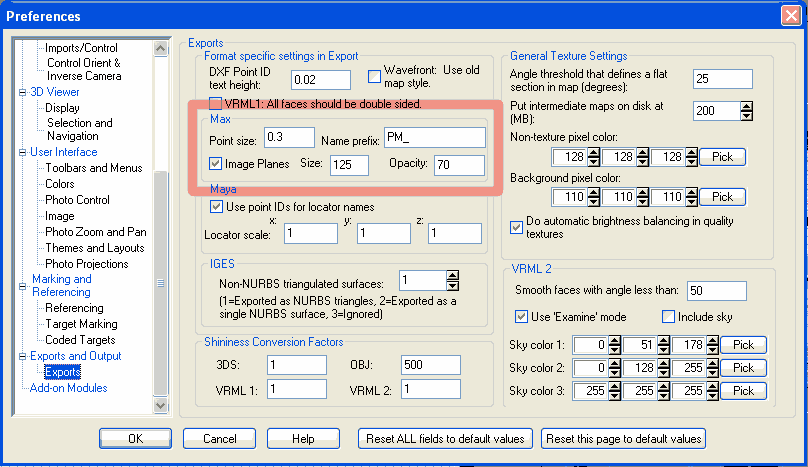
To include the image plane with the export make sure the Image Planes box is checked. Size is multiplied by focal length to determine the distance of the image plane from the camera. E.g. If the focal length is 10mm and the options dialog is set to 1000 the image plane will be located at 10,000mm from the camera.
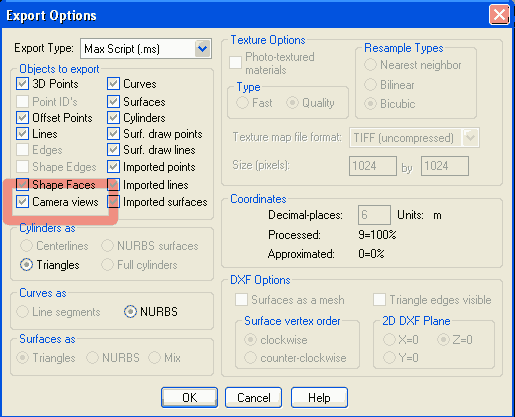
To export the image plane go to File>Exports>Export Model… and chose Max Script (.ms) as the Export Type. Make sure the Camera views box is checked.
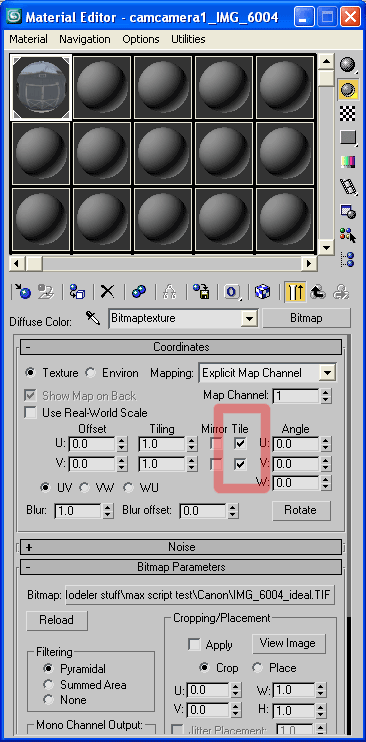
| In 3ds Max select MAXScript>Run Script… and navigate to the script file exported from PhotoModeler. To enable transparency open the Material Editor and select the material for the image plane. Press the M button next to the diffuse channel to bring up the map parameters panel. Uncheck the Tile boxes. You can now use the Opacity spinner to adjust the transparency. | ||
|

| To enable panning and zooming of a camera view without affecting the image plane, select the image plane then hit the Unlink Selection button. | |
| Use the Field-of-View button to zoom in and out. | |
| Use the Pan Camera button to pan the image. |
Freeze the image plane and camera to keep from moving them inadvertently. Before freezing the image plane be sure to uncheck the Show Frozen in Gray box under Display Properties.
Knowledge base article provided by Bill Isenberger of 3D-Garage.