

The Outline Library provides the capability of storing commonly used Outlines that can be quickly inserted into any project. The Outline Library is not project specific, that is, you can store an Outline in one project and use it in same project or in any other project.
You can save full Outlines with multiple parts or Outlines with a single part. The size is stored as well. For example, you might save an Outline Circle of a specific radius so you can more easily place in all your projects. The Outline Library is like Outline Duplicate in some ways – but is available in all projects.
The Outline Library is accessed with two buttons on the Outlines Toolbar:
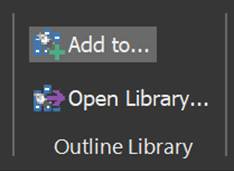
“Add to…” tool, adds the currently selected Outline to the library, bringing up a dialog that provides for entering a unique name:
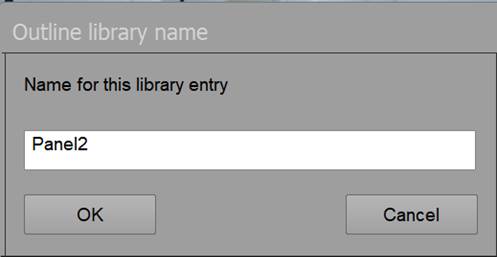
After you have named the item, press OK for it to be added to the Outline Library. Outline Library items cannot have the same name – there is a warning.
To access the Library and to add items from the Library to your project, use the “Open Library…” button in the Outline Library section of the Outline Toolbar.
When pressed the Outline Library dialog opens and lists all the Library items that have been saved. If you select an item you can delete it, or add it to the current project.
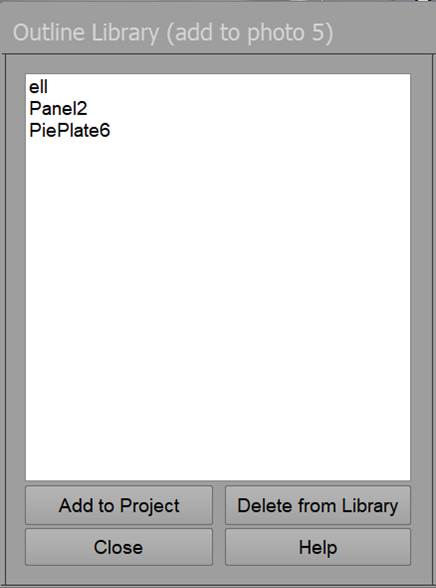
The title bar says which Photo the Outline will be added to. Steps: Open a Photo, Open Library, pick an item, press Add to Project, and chose a Surface (currently only Plane Surfaces). After the item is placed, it remains selected so that you can move it (drag or use arrow keys) or use Mirror, etc.
If you hold the SHIFT key when the Add to Project button is pressed, the inserted Outline will be added to the last used Surface (if there is one). This speeds up inserting multiple items from the Library to the same Surface.